Your cart is empty
Subtotal:$0.00

(updated 11/21/07)
Used with Permission from Ray Kawal
This modification allows the driver or passenger to enter navigation information such as destination or other points of interest anytime, whether or not the vehicle is moving.
These first photos are from the installation in my Z06
Photos further below are in my buddy's LT3 coupe with automatic and Selective Ride Control
 Here's the end result - a $3 switch from Radio Shack.
 In the switch position shown, the Navigation unit works the same as straight from the factory.
If you switch to the other position, you can enter destinations into the nav unit at any speed.
Once entered, you must switch back to get the nav unit to track your position.
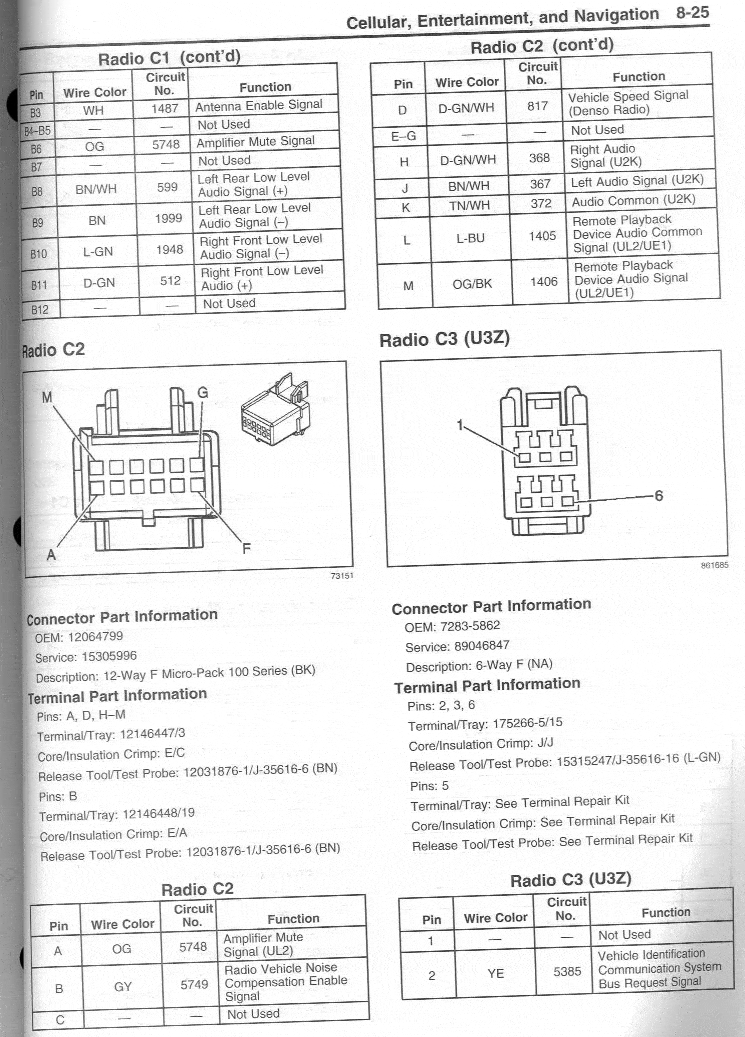 The Denso manufactured nav unit has a number of connectors plugged into the back of the unit.
Connector C2, Pin D, is the signal from the Vehicle Speed Sensor. This signal is used to not only indicate movement of the vehicle on the nav maps,
but it also allows the nav unit to remove the various destination displays once the vehicle is moving about 3-4 mph.
This feature is installed for safety reasons so the driver can't be fiddling with destinations while he or she is driving.
But if there is a passenger, why not let him or her input destinations while you are traveling?
Removing the speed sensor signal tricks the nav unit into thinking you are stopped, so you can input destinations at any speed.
Removal of this signal also prevents the nav unit from tracking, so you must put the signal back after you enter your new destination.
So the simple solution is to cut the wire to the 817 circuit and splice in a switch.
Follow along to see how to do it.
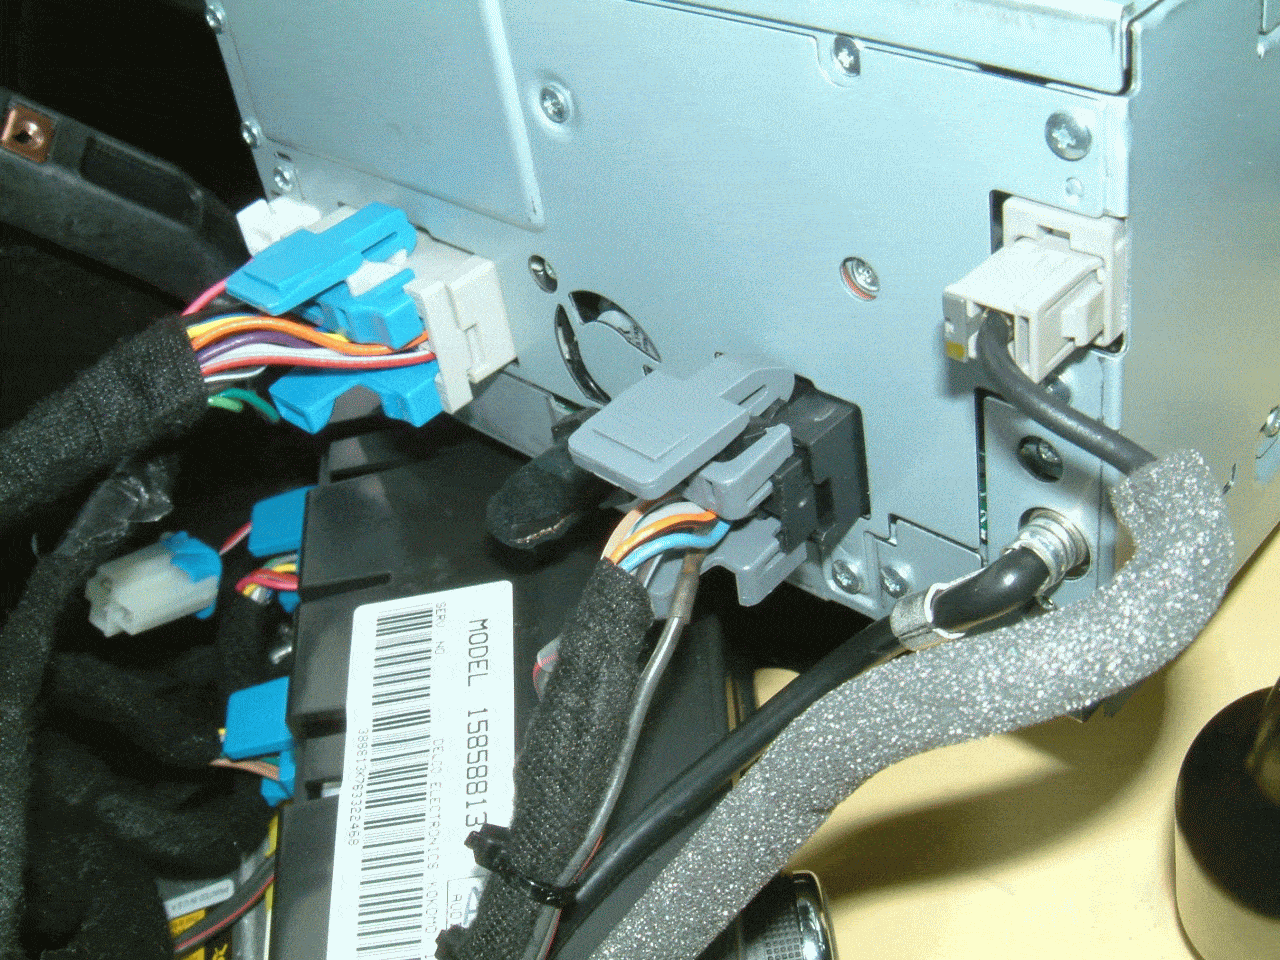
Here's the back of the nav unit.
The plug on the right (Connector C2) is the one we want to get to.
 Here is the nav unit and the heating controls sitting in place after the trim panel is removed.
 (All six screws holding them in place are removed.)
To get to this stage, you'll need a few Torx screwdrivers and a 7mm nutdriver.
1. Open your console cover (lid) and remove the cover with a Torx driver (4 small screws).
2. Pull down the emergency brake boot in the front and it will reveal two 7mm screws holding the side trim plate on. Remove the two screws and pull down the side trim plate away from the dashboard.
2. Lift up on the back of the small trim plate (tombstone shaped) where the switch will be mounted (see 1st photo).
This plate is held in with two snap fasteners, so just lift firmly at the rear and it will come loose.
(Note that for the 2008 consoles, there is no tombstone plate.)
3. Push down on the leather shifter cover to expose the Torx screw holding the shift knob in place.
Then remove the knob.
(Note this is not necessary for automatic transmission cars.)
4. Remove the two screws at the rear of the trim panel inside the console using a 7 mm nut driver.
5. Pull up firmly on the trim panel at the rear and it will come loose. Notice in the photo above
that there are also snap fasteners at the front (all six are shown in the blue tape).
As you lift the panel, these front fasteners will pop out as you lift.
6. Once loose, you will need to disconnect the plugs for the seat heaters (if you have them), the cigar lighter, the traction control switch, and the hazard warning switch.
This is necessary to get the trim panel out of the way.
I found it easiest to move the shifter into 2nd gear so it will clear the trim panel easiest.
7. Lay the trim panel on the passenger seat out of the way. Once done, you will see what is in the photo above.
8. Remove the two screws holding the heater controls in place, pull it out a bit, and lay it down.
9. Remove the four screws holding the nav unit in place, and pull it out enough to get to the rear plugs.
10. Press down on the Connector C2 lock and pull it out of the nav unit.
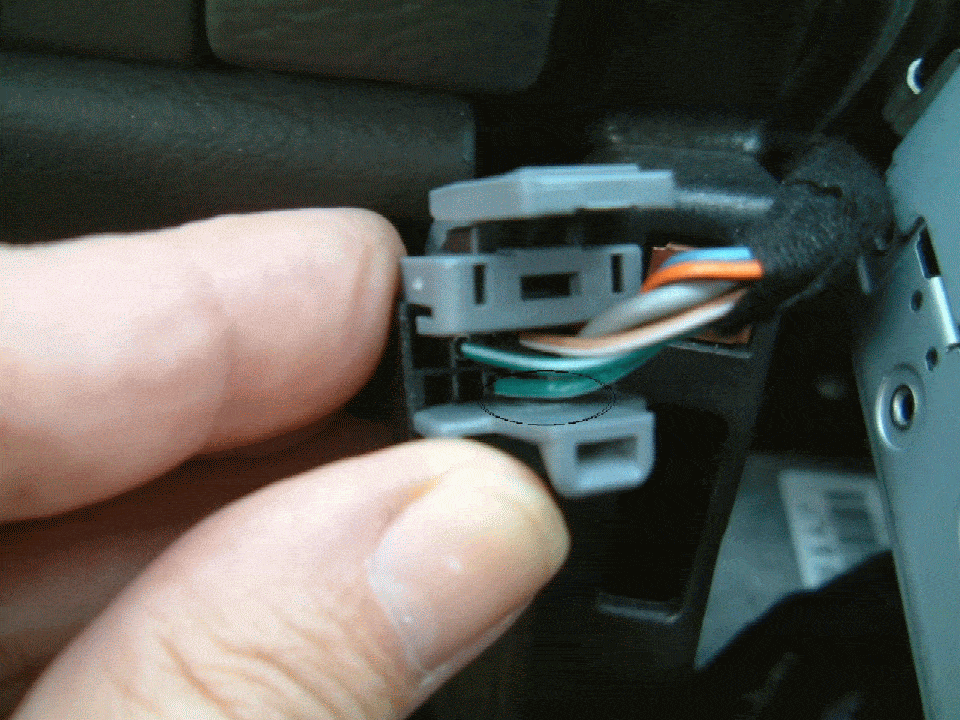

Here's a closeup view of the back of Connector C2.
The green/white wire on the bottom (Pin D) is the one we want to cut.
Note that there is another green/white wire in Pin H - do not mistake this wire for the correct one.
Remove the gray wire keeper at the bottom of the plug to provide easier access to the wire we want.
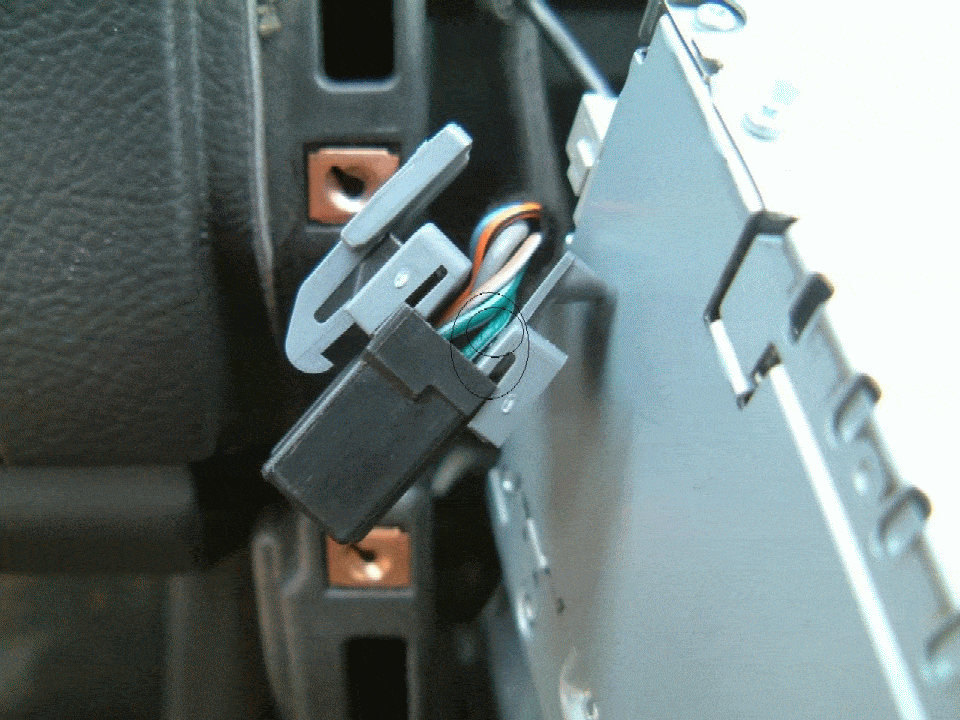
Here's another closeup view of the C2 connector. The green/white wire shown is the one we want to cut.
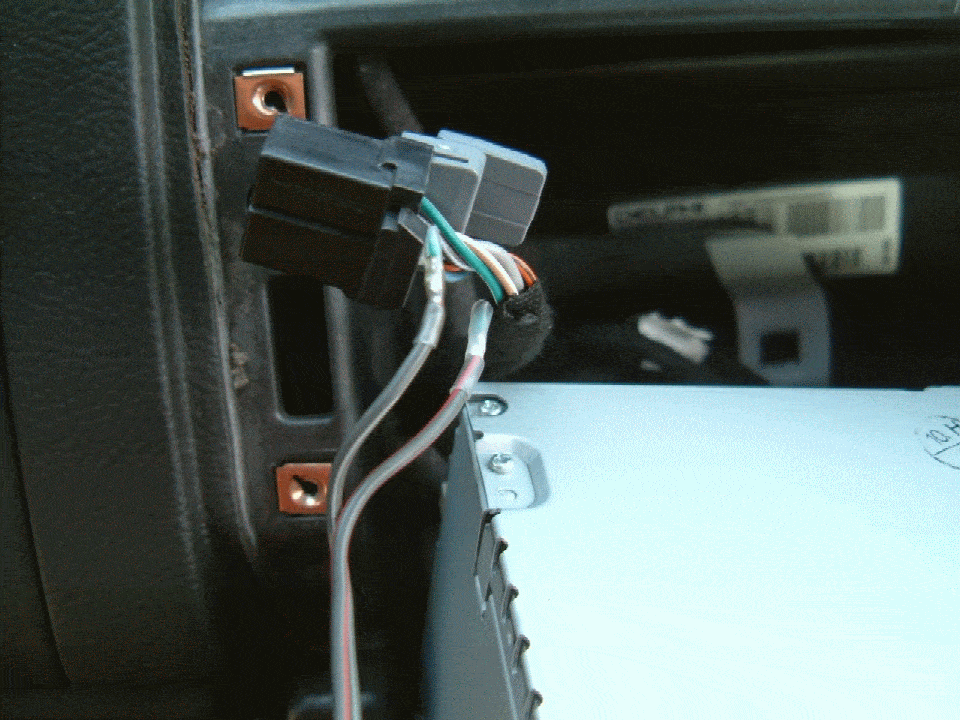
Obtain some two conductor wire (about 3' will do) for splicing into the circuit.
I found some 18 gauge speaker wire I had laying around works very well.
Cut the green/white wire between the plug and the cloth insulation, then solder the two new wires to the ends.
Use heat shrink tubing to insulate the connection.
This is the hardest part of the job, because of the care you must take in splicing the wires.
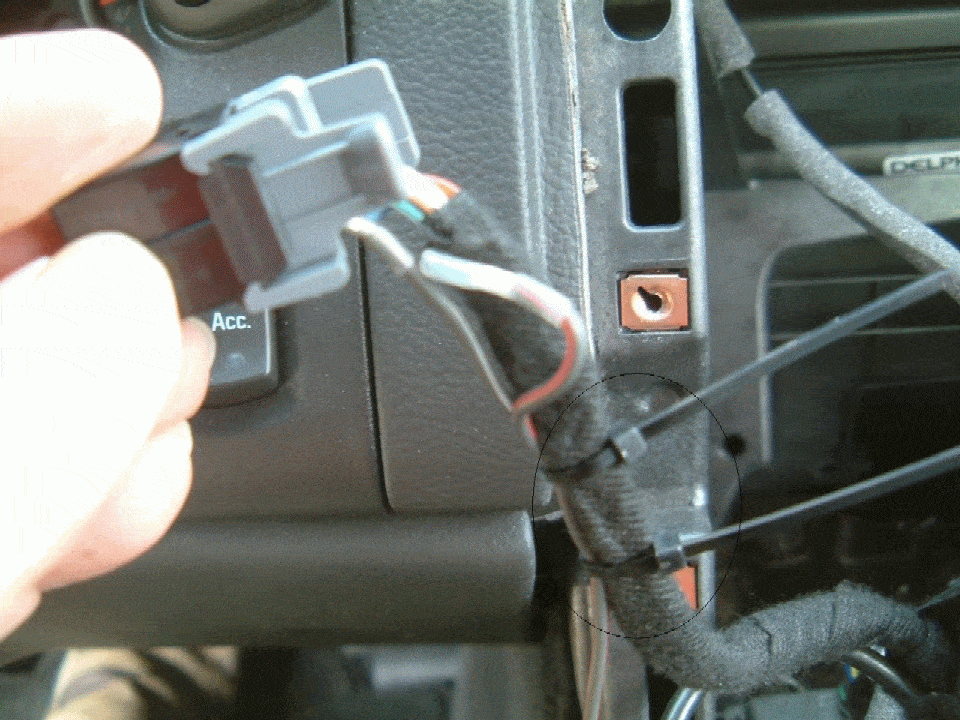
Install a couple of cable ties to prevent accidentally pulling on the spliced connections.
Now all of the hard work is done. Reinstall the gray wire keeper on Plug C2, then plug it back into the nav unit.
Route your new wire under the nav unit and reinstall the nav unit with the four screws.
Reinstall the heater control with the two screws.
Route the new wire along the console to where the new switch will be.
Reinstall the trim panel after reconnecting the plugs you previously removed.
Reinstall the shifter knob.

Any small switch will do, but this one from Radio Shack worked great.
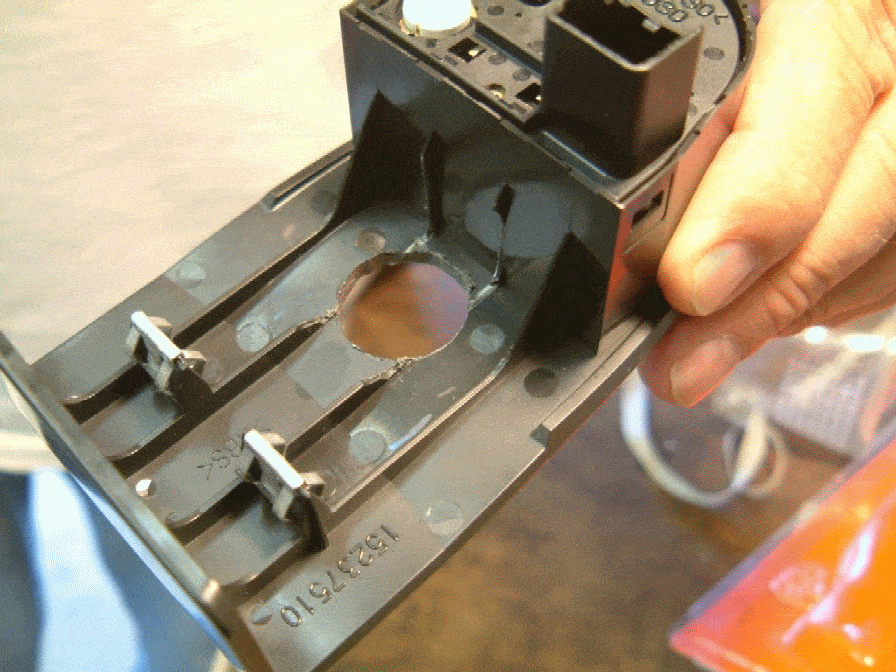
It mounts in a 3/4" hole drilled in the plastic trim plate.
Simply connect the loose ends of the new wire to the switch using push connectors and snap the trim plate back in place.
Install the console cover and you're done.

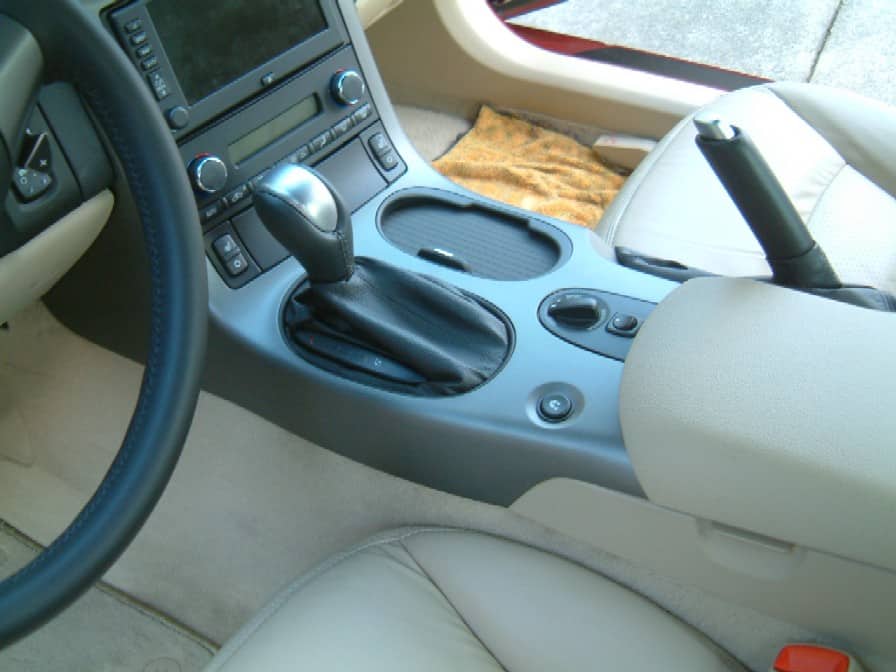
The shot above was taken after I installed a new 2008 console in my Z06.
The '08 console does not have the small "tombstone" plate for the F55 suspension where I mounted the switch shown in the previous photos.
Rather than drill a hole in my new console for the old switch, I decided to remove the cigarette lighter and use that location for a new switch.
The new switch I also found at Radio Shack, model number 275-730.
Now I have to flip open the ash tray door to use the switch, but it's pretty easy.
To use the modified nav system, leave the switch in place as shown, except when you want to enter a new destination.
While you are driving, switch to the other position, which removes the speed signal from the nav unit.
Your Destination Menu will reappear, and you can input whatever you want.
Once you select "Guide" and the nav unit recalculates your route, move the switch to the normal position for tracking.
Now that your frustrations are over, enjoy the nav system as it should have been designed!!
(Update 6/22/07):
After a 2000 mile trip, the nav mod works great! But there is one issue to note.
When the switch is in the "mod" position, there is a limited time you have to input data
before the nav unit resets itself and you lose the Destination Menu.
Usually, there is sufficient time to input your data, but occasionally you will have to switch back to "normal" and wait a few seconds for it to blink.
Then switch back to the "mod" position and continue entering your data.
If you are waiting for a long "list" of points of interest, you may have to switch back to "normal", then "mod", a couple of times.
My buddy with an LT3 Coupe with the F55 Selective Ride Control Option
also wanted the mod, so we put it in his Vette today.
Here are some photos:

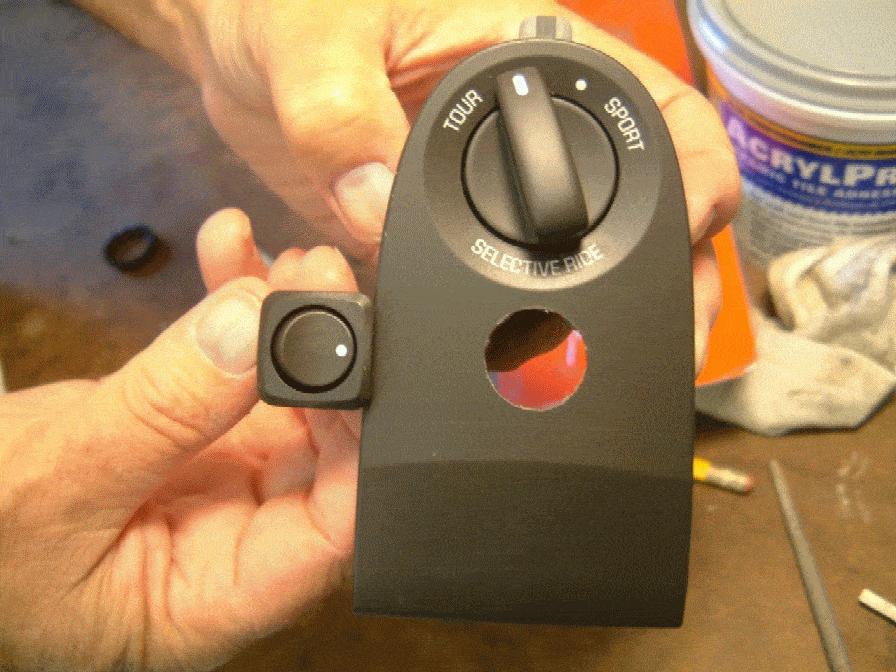

You could also mount the switch on the side of the console in the white area above.


